No reviews yet. Be the first to review this recipe.
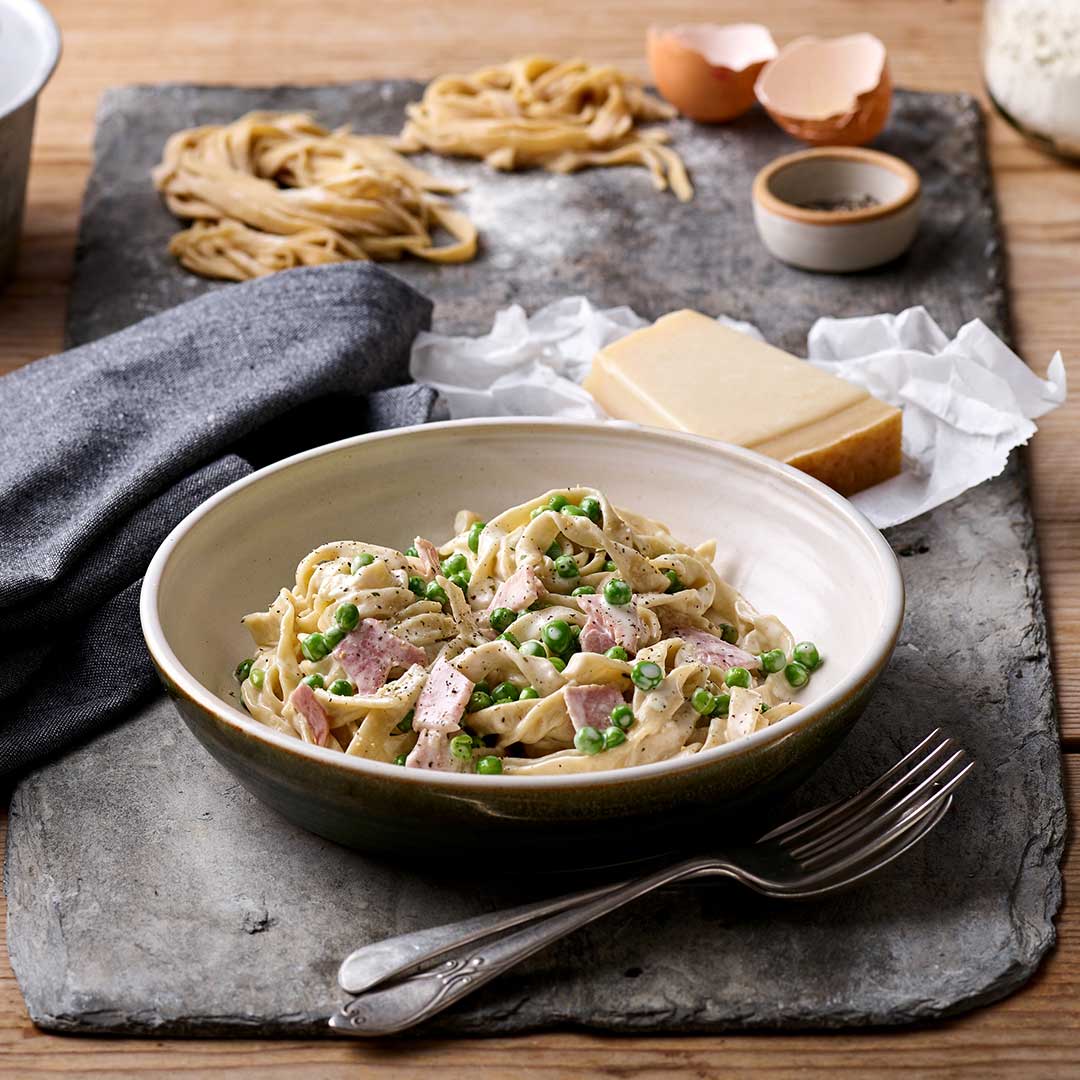
Pasta Flour Ham, Pea and Cream Tagliatelle
No reviews yet. Be the first to review this recipe.

About this recipe:

A family favourite, thanks to Uncle Mark, this comforting combination of simple ingredients creates a stunning and satisfying lunch or supper dish. And using just one saucepan means there will be less washing up at the end of the meal. Peas are an essential ingredient in this dish but the ham and parmesan can be swapped for bacon or chorizo and grated cheddar.
Equipment:
pasta machine or rolling pin, large 2lt saucepan and mixing bowl
Ingredients:
FRESH PASTA DOUGH
80g Doves Farm Organic Pasta Flour
pinch of fine salt
1 egg
flour, for dusting
TO COOK FRESH TAGLIATELLE AND PEAS
2l water
pinch of salt
150g frozen peas
HAM AND CREAM SAUCE
250ml fresh cream
150g ham
salt and pepper
50g parmesan, grated
Method:
Pasta Dough
- Put the flour and salt into a mixing bowl and stir to combine.
- Make a depression in the middle of the flour.
- Break the egg into the middle of the flour and beat with a spoon, allowing a little flour to be incorporated.
- Continue stirring as the flour mixes in, eventually forming a dough.
- Gather the dough together and knead it for 100 presses to make a smooth ball of dough, adding a little flour only if needed.
- Cover and leave the dough to rest for 15 minutes.
Tagliatelle Made Using a Rolling Pin
- Sprinkle flour over the table and rolling pin.
- Cut the pasta into four pieces.
- Roll each piece into a rectangle 1mm/1/32” thick, turning it over regularly and dusting lightly with flour.
- Using a knife, cut the dough rectangles into 7mm/¼” wide strips.
- Dust the tagliatelle with flour to stop it sticking and lay it out, or hang long pasta over the edge of a tall saucepan, for an hour to dry.
- Uncooked pasta can be chilled for up to 24 hours before using.
Tagliatelle Made Using a Pasta Machine
- Dust the pasta machine and the table liberally with flour.
- Cut the dough into four pieces.
- Flatten each piece of dough with your hands and pass it through the widest, flat roller of a pasta machine to make a rectangle.
- Fold the rectangles in half, pass them though the roller again and lay the rectangles on the floured table. If the dough seems sticky, dust it with flour.
- Do this a couple more times, trying to keep the pasta dough rectangular.
- Decrease the roller width 3 or 4 notches and pass the rectangles through a couple of times, to make longer rectangles.
- Reduce the roller width a couple more times, lightly dusting the pasta with flour until it is 1mm/1/32” thick.
- Pass the pasta through the tagliatelle cutter.
- Dust the tagliatelle with flour to stop it sticking and lay it out, or hang it over the edge of a tall saucepan, for an hour to dry.
- Uncooked pasta can be chilled for up to 24 hours before using.
To Cook the Fresh Tagliatelle and Peas
- Put the water and salt into a large 2lt saucepan and bring it to a rolling boil.
- Add the pasta and stir to ensure it is free flowing in the water.
- Cook for 3-6 minutes, depending upon the final size and thickness of the pasta.
- To test if the pasta is cooked, carefully remove a piece of pasta from the pan, cut it with the side of a fork and if the pasta resists continue to cook the pasta.
- Repeating the fork test every minute until the fork cuts with only a small amount of resistance.
- When the tagliatelle is cooked, add the frozen peas, remove the pan from the heat and leave to stand for 2 minutes.
- Drain the pasta and peas and return them to the saucepan.
To Serve Ham, Pea and Cream Tagliatelle
- Add the cream to the saucepan of pasta and peas.
- Slice the ham and add this to the pan.
- Return the saucepan to a gentle heat, season with salt and pepper and stir to combine and warm the cream.
- Add half the parmesan, stir to combine and tip everything into a serving bowl.
- Serve immediately with the remaining parmesan in a bowl.
Shop This Recipe:
Related Product Categories
Shop our full range


Leave a review?
YOU MAY ALSO LIKE


Leave a Reply