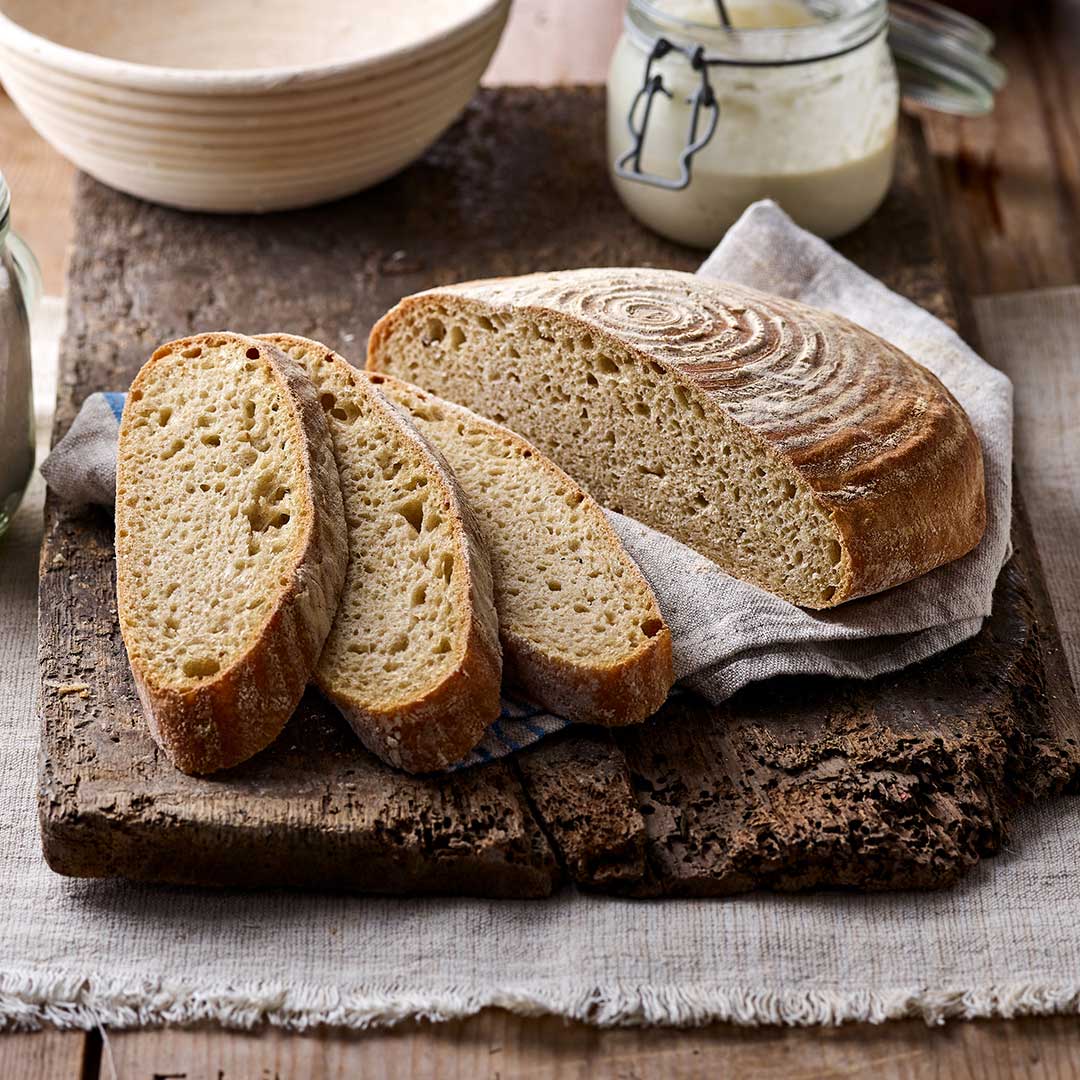
Classic Sourdough Bread

About this recipe:

A sourdough loaf made with the simple basic ingredients of flour, water and a touch of salt. We used Einkorn to make the starter and ferment followed by strong white flour to make the dough. There are three distinct stages to making a sourdough loaf, the starter, the ferment and the dough itself. The starter will take 3 to 4 days to develop and then another 412 hours to be transformed into the ferment necessary to rise the dough. This bread is traditionally risen in a banneton which creates appealing lines on the baked loaf although it could be cooked in a regular loaf tin. The bread itself will have an appealing and complex sourdough taste and aroma.
* Alternatively, use Organic Wholemeal Emmer, Organic Wholemeal Spelt Flour or Organic Wholemeal Rye Flour.*
Before you begin to make your sourdough, we recommend reading our Guide to Sourdough Making alongside our handy Sourdough Starter Table.
Equipment:
2 x large mixing bowls, banneton, oven tray and 500ml glass bowl
Ingredients:
STARTER
8-10 tbsp Doves Farm Organic Wholemeal Einkorn Flour *
8-10 tbsp tepid water
FERMENT
50g starter (from above)
150ml tepid water
100g Doves Farm Organic Wholemeal Einkorn Flour *
DOUGH
150ml tepid water
300g ferment (from above)
400g Doves Farm Organic Strong White Flour
1 tsp salt
1 tbsp oil
flour, for dusting
oil, for tray
Method:
220°C, Fan 200°C, 425°F, Gas7
Starter – use this handy chart to help you keep track of your feeding times.
- On the first day, put one tablespoon of flour and one of water into a 500ml glass bowl and mix together.
- Wet a clean tea towel, wring it out well, lay it over the bowl and leave in a warm place for about 12 hours.
- After the 12 hours have passed, add another tablespoon of flour and another of water, mix together, cover with the damp tea towel and leave for another 12 hours.
- On day two (24 hours since beginning your starter), stir in a third tablespoon of flour and a third spoon of water, stir to mix, cover again with the damp tea towel and leave in a warm place for 12 hours.
- For the second feed of day two, add a tablespoon of flour and one of water, stir to mix, cover with the tea towel and leave in a warm place for 12 hours.
- For the first feed of day three (36 hours since beginning your starter), increase the feed by adding two tablespoons of flour and two of water, stir to mix. Re-damp the tea towel if necessary, lay it over the bowl and leave in a warm place for 12 hours.
- On the second feed of day three, add one tablespoon of flour and another of water, mix together, cover with the damp tea towel and leave for another 12 hours.
- At this point your starter should be bubbly and ready to create your ferment. If the starter is not showing bubbles, repeat the 12-hour feed and water routine, and ensure the starter is kept in a warm place.
Ferment
- Once your starter is bubbly, stir it and measure 50g of the starter into a large mixing bowl.
- Pour 150ml water into the bowl and stir until lump free.
- Add 100g flour and stir to mix.
- Invert a larger mixing bowl over the dough bowl and leave in a warm place for 4-12 hours until bubbles appear. When bubbly, your ferment is ready to use (you can either dispose of any unused starter after bread making or keep and feed it regularly until your next baking session).
1st Dough
- Pour the tepid water into the ferment and mix well.
- Add the flour to the ferment and stir to mix.
- While the dough is still craggy and lumpy, stir in the salt.
- Using your hands gather everything together, gently pressing into a ball of dough.
- Knead the dough in the bowl for 100 presses without adding flour.
- Invert a large bowl over the dough bowl and leave in a warm place until double in size which may take 4–12 hours.
2nd Dough
- Dust the inside of the banneton liberally with flour.
- Run a spatula around the edge of the swollen dough.
- Pour the oil onto the dough and dip your fingers in the oil.
- Pick up the dough on the far side of the bowl, gently pulling and stretching it upwards then fold it forward onto the dough still left in the bowl.
- Turn the dough a quarter to the left or right.
- Repeat the action of lifting and stretching the dough then folding back onto itself five or six times, turning the bowl each time.
- Tuck the edges of the dough under to make a ball of dough.
- Transfer the dough into the floured banneton with the smoothest side down.
- Cover with an upturned mixing bowl and leave to roughly double in size, 2-12 hours.
Baking
- Pre-heat the oven 20 minutes before you are going to bake.
- Rub some oil around the inside of an oven tray or insert a baking liner.
- Remove the upturned bowl and very gently tip the dough onto the oven tray.
- Bake for 35-40 minutes until golden brown.
- Transfer the bread to a wire rack and leave to cool.
Click this link to find a handy Sourdough Starter Chart which when printed has space for you to enter the day and time that you feed your starter with flour and water and to help monitor progress.
This Guide to Sourdough Making contains lots of hints and tips for successful sourdough bread making.
Shop This Recipe:

Bread Flour
View Category


Related Product Categories
Shop our full range

Leave a review?
Leave a Reply
YOU MAY ALSO LIKE


Shari Bull
The easiest, most comprehensive and successful sourdough recipe I have found. Great bread!
Reviewing: Classic Sourdough Bread
Georgie
Followed the instructions for the starter. Brilliant. Then thought before I write a review I’d make sure it worked! It did. Very straightforward and helpful. Big success. Made some for friends who pay about £3:50 a loaf they were delighted with it.
Reviewing: Classic Sourdough Bread
Amy Robinson
THE best recipe I've found.
Reviewing: Classic Sourdough Bread
alpen
I have my own starter but otherwise followed this recipe exactly. The ratios are perfect & the method is foolproof. Easily the best loaf I've baked after previously trying various methods.
Reviewing: Classic Sourdough Bread
Janet Sinnerton
First attempt at sour dough bread. I followed your recipe and am very pleased with the result. Your recipe is clear and easy to follow. So much complex information on the Internet and sour dough starters that use a lot of flour. I actually have made 2 starters one using spelt and the other wholemeal flour. I found that weighing the flour and water was more accurate as my spelt starter became quite watery and I ran into problems. However this was rectified and I was able to rescue it. The spelt flour actually weighed lighter than the wholemeal so measurement as opposed to volume only for me was the best option. It was a totally different experience using wholemeal for my second starter am looking forward to baking my next batch. I printed your starter chart and found it helpful. However on day 3 you advice increasing the flour to 2 tablespoons in both the first and second feed which I followed. In the recipe text on the site point 7 states add ONE tablespoon of flour on second feed day 3. I think this perhaps is a typo and should be 2 tablespoons ?? Also did not have a banneton but found using a large Pyrex bowl to shape effective. Once again thank you Dove for great recipes and tips very much appreciated. Never thought I could ever make sourdough.
Reviewing: Classic Sourdough Bread
Ali
We have tried a number of sourdough recipes and this was the most successful by far. The first loaf took around 2 and a half days, the second one took a day in total to get through all 3 stages. Really delicious loaf
Reviewing: Classic Sourdough Bread
Faith
I already had a starter but used this recipe to make sourdough bread. It's easy and I'm in a good routine with it now. Take sourdough starter out of fridge in the morning, make the levain as it suggested, feed sourdough and put back into fridge. That evening add the rest of the flour, water and salt and do the 100 hundred 'presses', sometimes it's quite a wet dough but that's fine. Put it into an oiled bread tin. Next morning bake it, leave to cool and eat. This recipe gives a nice crusty loaf but soft on the inside.
Reviewing: Classic Sourdough Bread
Michael
As a total sourdough newbie this recipe, both for the starter and the bread, was one of the clearest I've found online. I followed the steps to create the starter exactly as outlined, and found I only needed one further 12 hour cycle for the starter to be ready to use. I similarly followed the recipe for the bread very closely and was very pleasantly surprised at how it all worked out. I let one batch of dough sit in the warm for too long, probably over proving it, with the result that it collapsed a bit, but other loaves have been fine. I now let my dough rise over night in the fridge which works well. I really like that the starter recipe uses just one tbl spoon of flour at a per feed. Some recipes suggest much more but the quantities given here resulted in creating a really strong starter that is producing good bread.
Reviewing: Classic Sourdough Bread
Gareth
I've found with all sourdough recipes that there's a lot of room for interpretation. For this recipe (and this is the first where I've had real success) I used a mother starter that I've made up from reading other blogs, etc. I used that to create my ferment using Dove's Farm white spelt (which was also used to make the mother). I left the ferment for about 12 hours overnight in a relatively cool (18-20 degrees?) kitchen. I then mixed all dough ingredients and kneaded on an unfloured surface (a dough scraper helps here) until it was just smooth. I left this for 5 hours in an oven with its light on and the door ajar to create about 24C, and after each hour, performed four folds to the dough. At the end of the 5 hours, I created a boule by pulling the bread towards me as I rolled it along the surface and then rested on the work surface for 30 minutes. Then I performed the folds again to create tension, left it to sit for a minute to be sure the folds had 'stuck' and tipped it carefully (exposed folds upwards, into a collander lined with a very well-dusted tea towel. After about an hour and 20 minutes I tipped it onto a pizza stone that I had warmed up in an oven from cold to 260C (don't put cold stone into hot oven!). The dough was slashed and spritzed with water first. I then reduced the temperature to 220 for 20 minutes or until it sounded like a drum when the underside was tapped. Folding and shaping techniques were picked up from seriouseats.com's workhorse loaf recipe which is hugely informative and is what I have always used for my yeast-based bread.
Reviewing: Classic Sourdough Bread